Introduction
In this blog, we'll show you how to make your authentication application. Authentication and authorization are indispensable aspects for any website project to grant users access based on their roles, as you may know. To build custom authentication, we utilize the membership provider class to check user credentials (username and password) and the role provider class to validate user authorization based on roles.
Our authentication system's scenario is as follows:
After the user enters his or her credentials (Login and Password), we must use the ValidateUser method from our custom membership provider class.
We need to choose a bespoke membership provider that will be utilized. We must make this change within the Web.config file.
When a user is successfully authenticated, the Authorize Attribute filter is automatically invoked to determine whether the user has access to the requested resource, and the role provider is the class that is responsible for doing so depending on the user role.
Note that we must also define a role provider in the Web.config file.
Create Your MVC application
First, open the Visual Studio and select File -> New Project
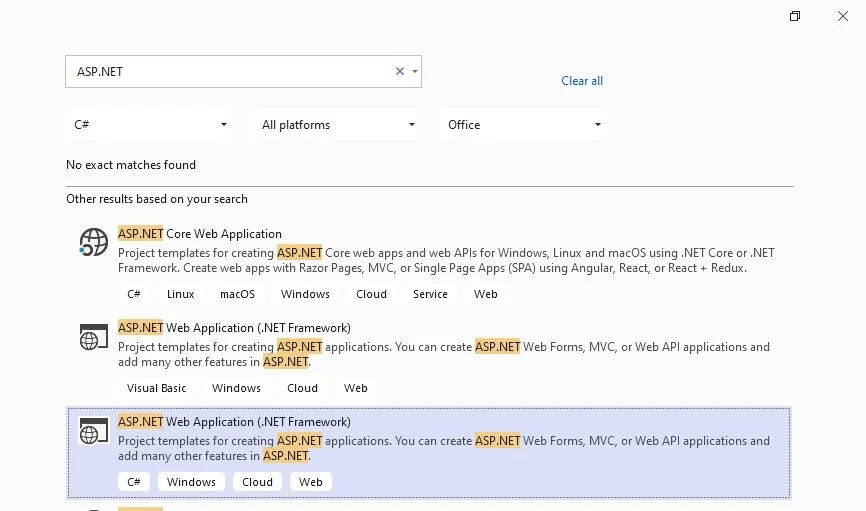
This will pop up the New Project window. Select ASP.NET Web Application(.NET Framework) and then click OK.
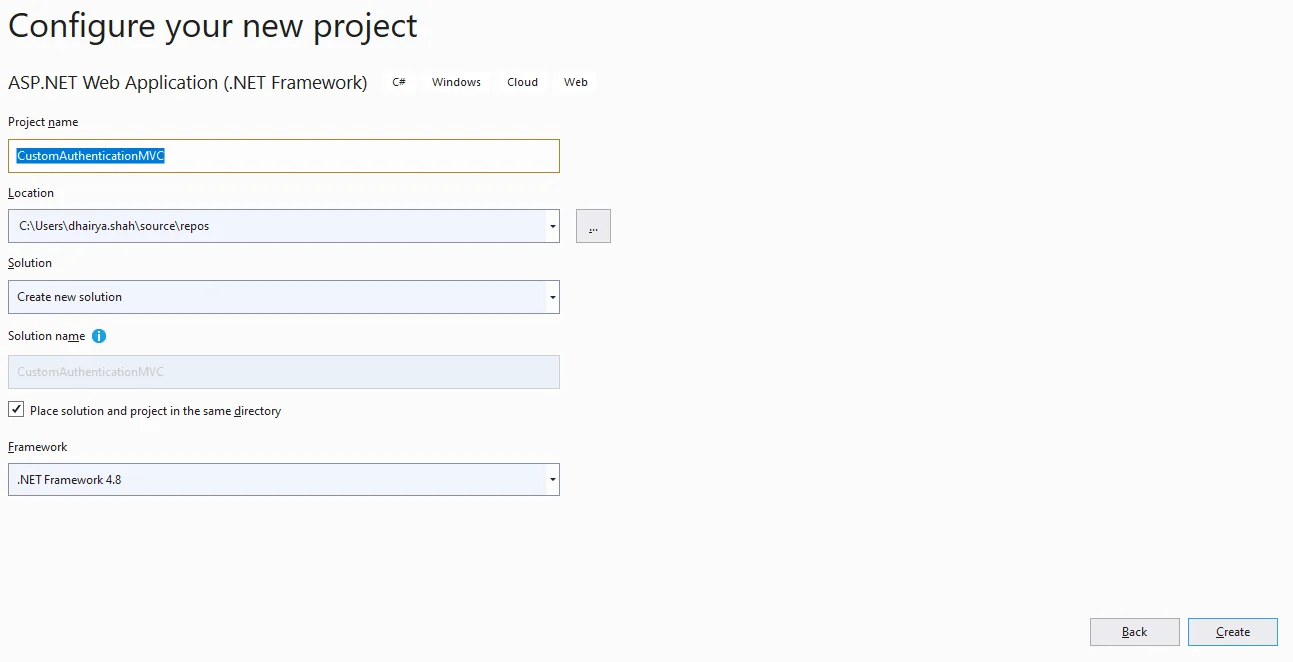
Now, give the name of the project like CustomAuthenticationMVC, and select the appropriate location where you want to save your project and then click on the create button to create your project.
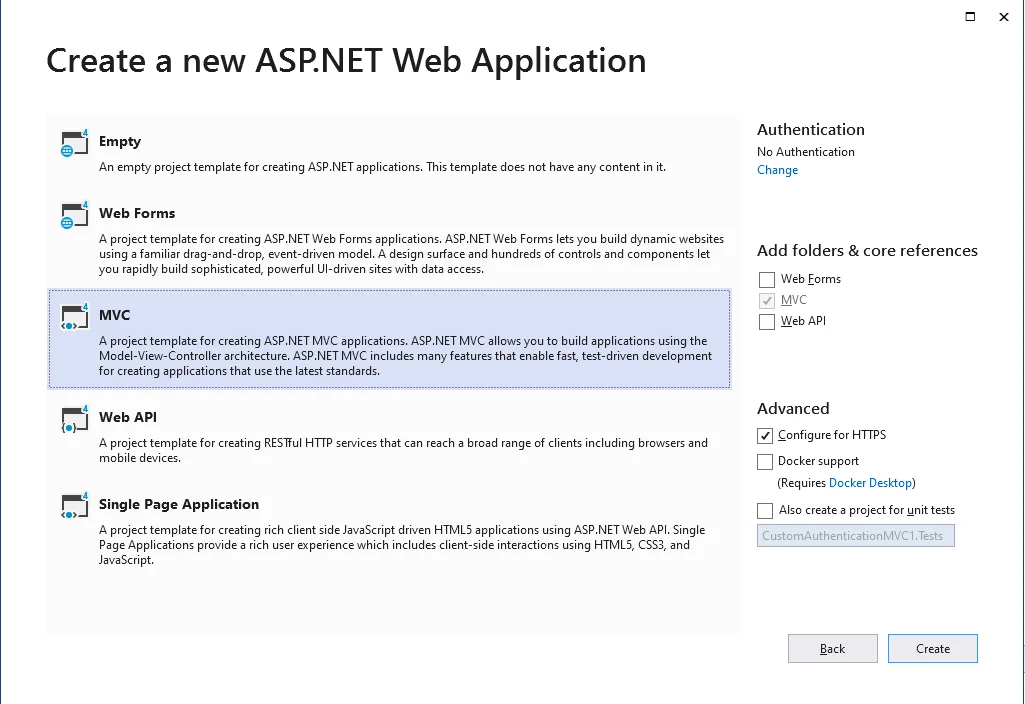
Then, choose MVC and click on create to add the project.
We will establish a database using the entity framework (Code first approach) once our project is created.
SQL Database part
Entity framework takes a variety of approaches to map databases, including database first, model first, and code first.
To construct our database, simply follow the steps below. First and foremost, we'll establish a folder called Data Access.
To accomplish this, right-click on the project name in Solution Explorer >> Add >> New Folder.
Then we'll add the User and Role entities.
Example
Example
As the last step, we're going to add our AuthenticationDB context, which will allow us to access database data. Normally, the context class derives from the dbcontext class.
Example
NoteMake sure you've included your database's connection string in the Web.config file.
Now enter the following command into the Package Manager console.
Read More: Generate Thumbnail Using Asp.net Mvc
Enable-migrations
After performing above aspects, now we're ready to start building our database. Executes the commands in the order listed below.
add-migration "initial_migration"
update-database –verbose
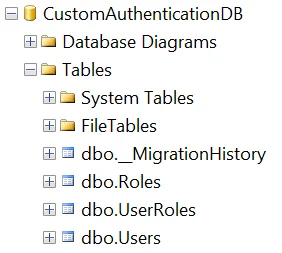
As you can see, all of the tables have been successfully added.
Implementing Membership Provider and Role Provider
Let's get started with the custom MemberShip Provider.
The first step is to construct the CustomMembership class, which should inherit from MembershipProvider.
After that, we'll override the following methods based on our requirements:
- ValidateUser is a function that takes two parameters: username and password, and checks whether the user exists or not.
- The GetUser method is in charge of returning user info based on the username input.
- GetUserNameByEmail takes an email address as an input and returns a username.
Example
As you can see, MembershipProvider offers a lot of methods like Create User, ChangePassword, GetPassword, and so on, but we only need ValidateUser, GetUser, and GetUserNameByEmail.
Here we can point out that the GetUser method makes use of the CustomMemberShipUser class to retrieve only the information we require about the user.
Example
The second step, as previously said, is to include our customerMembership in the Web.config file. Now we'll update the web.config file and add the following snippet of code.
We'll now use Custom Role Provider to implement it.
In this case, we'll construct a CustomRole class that inherits from RoleProvider and then override the GetRolesForUser and IsUserInRole methods.
Example
Note that the GetRolesForUser method takes a username as a parameter and returns all roles associated with that username. The IsUserInRole method takes two parameters: username and rolename, and verifies whether the user has a role that grants him access to the desired resource.
Want to Hire Trusted .Net Development Company ?
After that, add the following code snippet to the web.config file.
Custom principals and identities are now being implemented. We have a user property that contains basic user data by default to receive user information from HTTP requests. User information is accessed deeply using the IPrincipal interface. In reality, the Identity property of this interface encompasses all user data.
As previously stated, the user property only contains basic user information; however, the goal is to expand this property to include more useful data.
Now, we'll develop the CustomPrincipal class, which will inherit from the IPrincipal interface.
Example
NoteWe'll add the following code snippet within Global.asax to replace the default user property from HttpContext.
Example
Create a controller
Following the implementation of Custom Membership Provider and Custom Role Provider, I think it is now time to design an Account Controller with all of the required actions to assist us in authenticating users.
We're going to make a controller now. Right-click the controllers folder> > Add >> Controller>> MVC 5 Controller - Empty>> Add. Name the controller “AccountController” in the following dialogue, then click on the Add to add controller successfully.
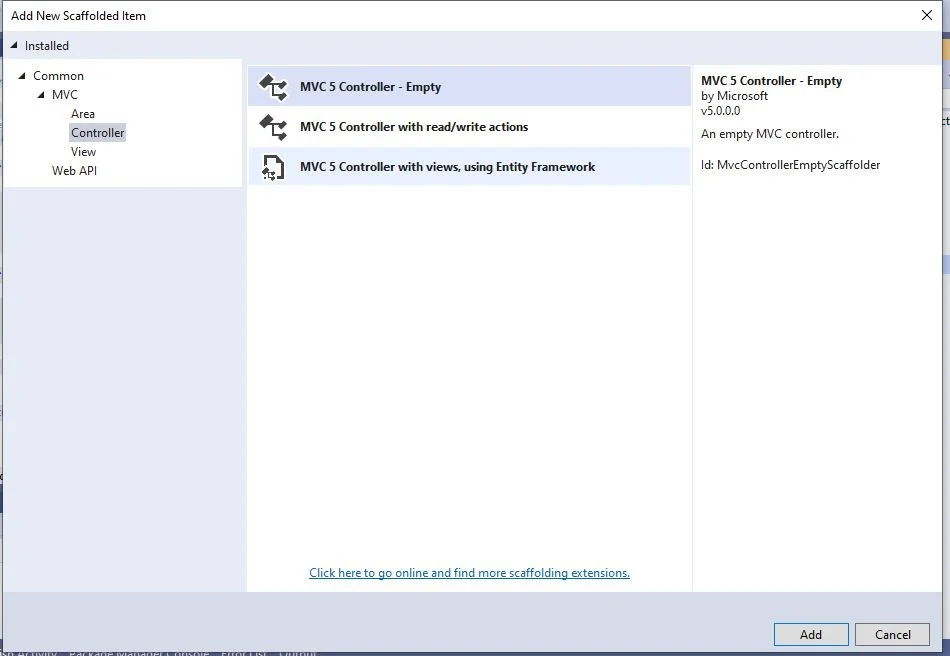

Example
Account controller has three major actions, as you can see above.
- Check to see if the person who is going to create a new account has already been created. To do so, we'll use the CustomMembershipProvider's GetUserNameByEmail function.
- After that, we'll save user information.
- We must activate the user account by sending a verification email to the user, informing him that he must activate his account by clicking on the activation link.
- Login action takes a loginView model as a parameter, which has a username and password properties, and then uses the ValidateUser method from custom Membership to check user credentials. If user validation is true, the GetUser function is used to retrieve user data.
- Following that, we'll create an authentication ticket that will be encrypted using the term FormsAuthentication. Finally, we'll encrypt (authTicket) and create a faCookie object with our ticket's encrypted value as the value.
- The registration action is used to create a new account for a user. This action will do three things on a deep level:
- The LogOut action allows the user to log out of his or her session, as the name suggests.
We must now add account views for login, registration, and activation.
Example
Example
Example
Authorization filter
We'll implement a custom authorization filter in this section.
We want to create a filter that denies access to the user controller if the connected user does not have a user role.
Let's take it step by step.
First, make a CustomAuthorizeAttribute class that is derived from AuthorizeAttribute.
Example
Example
When a user is successfully authenticated but does not have a user role, we should alert him that his or her access is denied. In the HandleUnauthorizedRequest method, we did something like this.
Example
Example
Conclusion
In this blog, we have learned about authentication and authorization in Asp.Net MVC using an example. It will assist you comprehending the importance of validation for any website.
Content source: https://www.ifourtechnolab.com/blog/a-detailed-guide-on-custom-authentication-and-authorization-in-asp-net-mvc
.jpg)


.jpg)